Showing posts with label How-To. Show all posts

Monday, February 28, 2011

Plain to Pretty : Ikea Billy Bookend Makeover

A few weeks ago I had my Ikea Initiation and I am working on my "want" list for the next time we go. :) One of the things I picked up was a Billy "B" Bookend. The one I got was a cream color and I am just a fan of cream as it simply does not work in our home so  I made a few changes.

Billy Bookend Makeover Tutorial

Supplies:
Spray Paint
Rub-ons 
Popsicle Stick


Paint letter in your color choice.

 Pick out Rub-ons to apply

Apply rub-ons in a scattered design

 Finished Product: Patterned and Pretty!


Do you shop at Ikea? What is your favorite purchase??


I am sharing this Makeover at the following Linky Parties
-be sure to go check out all the fabulous talent!


Making
Sumo Sweet Stuff


Becolorful


Tip Junkie handmade projects

Thursday, February 24, 2011

Book Leaves - A Tutorial

During these final(I hope) days of Winter I wanted something that would bring a little life into a room. While I love plants they always seem to meet an untimely death in our house so I need something that looks nice but is already DOA.
I decided since I have an abundance of twigs here up on the Mountain and I have a multitude of books laying around I figure why not put them all to good use.

Book Leaves: How-To

Supplies:
Twigs of various lengths
An old book
Scissors
Glue


Cut out oval leaf shapes - I cut 3 different sizes.


 Apply small dab of glue to one end of a leaf


 Attach leaves to each end of the twigs.


 Put as many or as few as you would like.


Loving how this looks and can not wait to do lots more to put in a taller container!

Thanks to Heather @ twentysomething for letting me take some photos at her house :)

Now I am onto my next project which is a biggie and has some things are a whole new world for me. Needless to say I am nervous and excited at the same time!
What have you made this week?


Linking to the following parties -- go by and check out all the fabulous links!
Linking this up to the following Parties - go by and check them out!
giveaways 
HookingupwithHoH


Transformation Thursday
Show and Tell Green


Weekend Bloggy Reading

Wednesday, February 16, 2011

Scattered No Longer

It has come to my attention that I have a bad habit of not taking off my jewelry when I go to bed. The reason I have deemed this a bad habit is because a few hours later I will wake-up with a necklace(or two) all tangled in my hair, or a scratch on my face from the bracelet I left on. When this happens I tend to untangle myself, take off said pieces of jewelry and toss them on my nightstand. The bad part, not worse than the tangles/scratches mind you, is that when my alarm goes off in the morning the jewelry gets scattered all over the place -- no fun finding it all again.

Due to this habit I have been on the lookout for something to hold my jewelry. Yes I have a jewelry box and even a necklace holder in the bathroom but for some reason I never take the pieces off when I am near them.

A few weeks ago MeganDVD @ BeautyintheAttempt posted her PB Knock-off  and it hit me -- that is what I need but a bowl!! --Thanks Girl!

Since I was on my way to town I figured I might as well stop by the Dollar Tree and see if I could find what I needed for the project. -- They DID! $2.14 later I was ready to work!

Supplies:
1 - Glass Bowl $1.00
1 - Glass Candlestick $1.00
1 - Tube of Epoxy Free(The HandyMan already had it!)


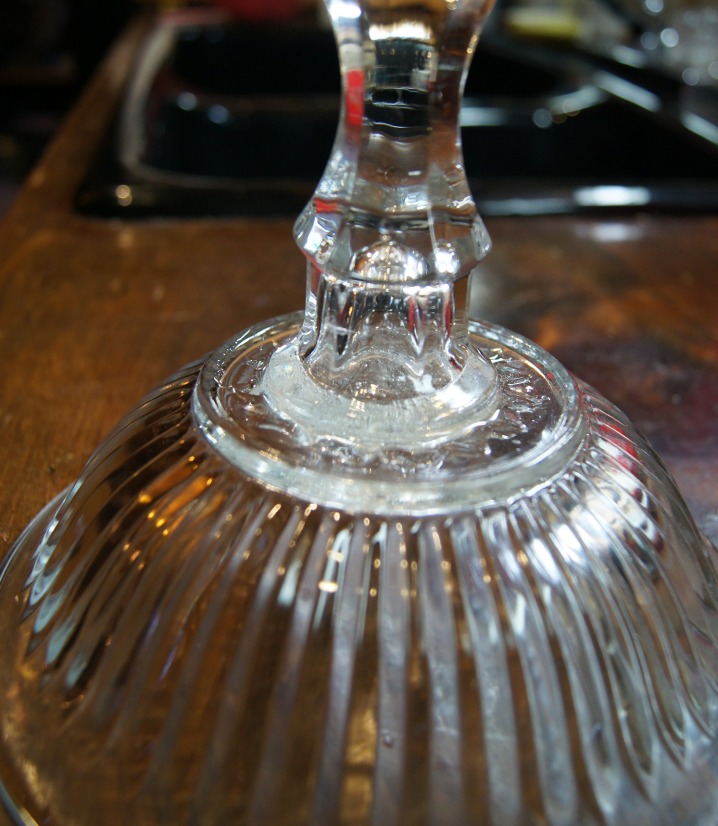
Step 1: Invert the Glass Bowl as shown
Step 2: Use Epoxy as directed to the bottom of the bowl and a-fix candlestick(also inverted -- you never know)


Step 3: Let dry overnight
Step 4: -- there is NO Step 4! How easy is that?!? A 3-Step project!!

Now you can use your new glass bowl pedestal to hold whatever it is you need. Maybe some pretty soaps by the sink, your daughters hairbows, or like me -- jewelry on the nightstand.

For now I had a slight change of plans and mine is displaying the lovely seashells my son brought me from his field trip to Jekyll Island last week :)


Later it will look like this:


What is something you have made that helped you out recently?


Check out my Party People for Linky Love!

What am I working on next?

Sneak Peek